

Few things I love more in wedding planning than a beautifully executed DIY project. Not the kind that looks homemade in the wrong way, not the kind that looks visibly rushed or over ambitious, but the kind where genuine creativity, real care, and an investment of personal time transform simple and affordable materials into something that guests actually stop and admire. DIY weddings have a warmth and personality that no amount of money can fully replicate. Every choice is specifically yours, assembled over weeks or months rather than handed over to a professional who produces the same result for every client. The small imperfections that inevitably appear in hand made things only add to the feeling that real human beings created this day with love and intention. Whether you are choosing the DIY route because your budget demands it or simply because you enjoy making things and want your personality to show in every corner of your wedding, the results can be genuinely stunning. Here is a thorough guide to the most impactful DIY wedding ideas you can execute at almost any budget level, from the ceremony arch through to the sparkler send off.
Start With a DIY Wedding Arch
The ceremony arch is the visual anchor of the entire wedding. Every photograph taken during the vow exchange will have it in the background, which means the effort you invest in this single element pays dividends across your entire wedding gallery. The very good news is that a genuinely beautiful ceremony arch is very achievable as a DIY project, even without specialist skills or tools.

A basic metal arch frame is available online or from garden centres and party hire suppliers for a very modest cost. From there, the styling is entirely your choice. Drape fabric over the top rail, hang fresh or dried flowers from the sides, wind greenery through the structure, or combine all three approaches into a layered installation. A lush greenery arch with a few statement blooms tucked in strategically costs a fraction of what a fully florist designed arch would, and it looks just as beautiful and intentional in photographs when the greenery is applied generously and the styling is consistent throughout.
For an even more budget conscious option, build the arch frame yourself from PVC pipe or copper pipe. Both materials are available at hardware stores and can be assembled into a simple rectangular or rounded arch shape without any special tools beyond a pipe cutter, which most hardware stores will use for you in the shop. Paint the completed frame the colour of your choice before styling. White, matte black, and natural copper are all popular finishes that photograph beautifully as backdrops for ceremony florals. The cost of a DIY pipe arch is typically a fraction of a purchased frame, and the result is structurally sound and fully customisable in terms of dimensions.

When styling the arch, work from the top down and from the outside in. Start with your greenery base, covering the frame generously before adding any flowers. Greenery is inexpensive, forgiving, and provides the lush foundation that makes floral accents look more abundant and intentional. Once the greenery is in place, add your focal flowers at the points where the eye naturally falls: the upper corners, the top centre, and the lower sides. Finally, fill any gaps with smaller blooms or additional greenery. Stand back frequently while you work to check the balance from a distance, which is how it will be seen during the ceremony itself.
DIY Centrepieces That Look More Expensive Than They Are
The centrepiece is the element of the reception table that guests look at most consistently throughout the meal, which makes it worth investing genuine creative energy in even when you are keeping costs firmly controlled. The secret to DIY centrepieces that look professionally polished is restraint combined with consistency: pick one clearly articulated concept and execute it confidently across every table in the room rather than trying different ideas on different tables or hedging toward variety that reads as indecision.

Mason jars filled with seasonal wildflowers or simple garden blooms and arranged in groups of three at varying heights are one of the most consistently beautiful and affordable centrepiece approaches available. Buy the jars in bulk online to bring the cost per jar down, source seasonal flowers from a wholesale market, a local farm, or a supermarket with a decent flower section, and assemble the arrangements on the morning of the wedding with a few friends helping. The conversation and the laughter that happens during a flower arranging session is itself a memory worth having. The whole setup costs less than most couples spend on a single florist arranged centrepiece from a professional, and the result is often warmer and more characterful.

Vintage bottles in varying sizes collected over several months before the wedding are a beautiful and free alternative to mason jars. A single bloom in each bottle, grouped together in odd numbers with candles and greenery scattered between, creates a centrepiece that looks curated and personal rather than generic or assembled from a single source. You can build a collection of interesting bottles for free by asking at restaurants, bars, and cafes, or picking them up slowly from op shops over the months of planning. The variety of shapes and sizes within the group creates visual interest that a matching set of vessels cannot achieve. For more creative approaches to using reclaimed and found materials in your wedding decor, these DIY wedding ideas with vintage windows offer plenty of additional inspiration.
Create a Beautiful DIY Drinks Bar
A thoughtfully styled drinks station is one of the most photographed reception elements after the cake table and the couple themselves, and it is surprisingly simple and affordable to achieve beautifully as a DIY project. The key is to style it generously, add personal details that make it feel like something a couple created rather than something hired from a catering company, and think about the experience from the guest's perspective as much as the visual appearance.

🦋FREE Wedding Planning eBook!
Hundreds of money-saving ideas from wedding experts.
Packed with useful planning ideas and tips, a finance tracker and free checklists.
By downloading, you accept our Downloading Terms of Use and Privacy Policy.
A self serve beverage bar built on a timber palette, a reclaimed wooden sideboard, or an old outdoor table looks beautiful and personal in a way that hired bar setups typically cannot match. Fill a large glass drink dispenser with a signature cocktail, homemade lemonade, or herb infused water. Arrange mismatched glasses and cups at varying heights alongside the dispenser. Add a handwritten chalkboard menu naming each drink. Include some fresh cut fruit or herbs as garnish either inside the dispensers or as a small arrangement beside them. Label a drink after the couple, something like “Emma's favourite summer lemonade” or “James's signature gin and tonic,” and guests will seek it out specifically and photograph it every time.
The detail that elevates a DIY bar from functional to genuinely beautiful is usually the addition of small personal touches: a note about the sourcing of a particular ingredient, a small bunch of fresh herbs that also serve as a garnish, or a handwritten ingredient board for guests with dietary considerations. These micro decisions require almost no additional cost but they transform the station from a place to get a drink into a moment of deliberate hospitality that guests notice and appreciate.
DIY Wedding Signs That Tell Your Story
Signs serve both a practical guiding function and a deeply decorative one at weddings. They direct guests efficiently through the venue, they communicate the couple's personality and sense of humour, and they photograph beautifully in the behind the scenes coverage that makes up such an important part of the modern wedding gallery. DIY signs are one of the easiest and most immediately rewarding wedding projects to take on because the materials are cheap and widely available, and the only skill required is patience, practice, and a willingness to accept that the first attempt might need to be redone.

Chalkboard signs are a perennial DIY wedding favourite because the aesthetic is warm, the result is very forgiving since mistakes can be wiped and redone, and the look works in almost every wedding style from modern minimalist to full country rustic. The key with chalkboard signs is to seal the finished lettering with a very fine mist of hairspray before the wedding day to prevent smudging, especially if the signs will be in areas where guests might touch them or where the air is humid.

Country rustic signs painted or burnt onto timber planks and reclaimed wood carry a warmth and authenticity that printed signs produced by a graphic designer and a printer never fully achieve. The hand lettered quality of a sign you made yourself communicates something to guests that goes beyond the words on the sign itself. It says: we made time for this. We chose to spend a Saturday afternoon creating something personal rather than simply ordering something convenient. That choice registers with guests even if they could not articulate exactly why the sign feels different from one that was professionally made.

For consistency across your signage, choose a single font style before you begin and practice it extensively on paper before committing to the actual sign material. A consistent font across all your signs, whether printed, painted, or chalked, creates the impression of a designed suite rather than a collection of individual items made at different moments. That perceived design coherence is one of the most important quality signals in DIY wedding decor and it costs absolutely nothing beyond a little planning.
DIY Wedding Favours and Guest Details
Favours are traditionally one of the last things couples plan and often the first things guests leave behind on the table at the end of the night, which is a genuinely useful signal about what kind of favour is worth making. The DIY favours that guests most consistently take home and enjoy are the ones that are consumable, useful, or both. Think homemade or locally sourced jam in small jars, a packet of seeds suited to your geographic area, a small handmade candle, a bag of loose leaf tea with a personal label, or a small chocolate truffle box. Package them simply with a card in your wedding font and a brief personal note from the couple, and you have something guests genuinely appreciate rather than a decorative item that ends up in a drawer.

Small handwritten place cards at each seat add a personal touch that requires very little time per card but makes every guest feel individually considered and welcomed. If you have lovely handwriting, write all the cards yourself in the quiet days before the wedding. If not, print the names in a beautiful font and add a small hand element, a wax seal, a tiny pressed flower, a hand drawn botanical motif, or a length of ribbon tied around each card, to give them a personal quality that pure printing cannot provide. The total cost per place card is often cents, and the effect is far warmer than a standard card.
DIY Seating Chart That Becomes a Feature
The seating chart is a practical necessity at most weddings that also presents an opportunity to create a genuine feature element. Rather than using a standard printed board, consider an approach that reflects the overall aesthetic of your wedding and that guests will actually want to stop and look at rather than scan and move past.

A vintage ladder with individual table cards clipped to the rungs, a large old window frame with table assignments written directly on the glass panes in white chalk marker, or a floor length mirror with guest names in elegant script are all approaches that look beautiful, cost very little to produce, and create a natural gathering and conversation point for guests arriving at the reception. These types of seating displays work particularly well in the transition space between ceremony and reception, where guests are moving between spaces and appreciate a beautiful focal point to pause at before finding their seats. For more DIY ideas that use reclaimed and repurposed materials, these DIY wedding pallet ideas offer a great range of concepts that complement the same aesthetic.
DIY Wedding Decor Details


Some of the most impactful DIY details at weddings are the smallest ones, the ones that individually cost almost nothing but that collectively add up to an atmosphere of genuine personal care. A personalised ring pillow sewn from fabric that belonged to a grandmother. A message board on a repurposed window frame where guests can leave notes for the couple. A small framed print of the couple's favourite song lyrics placed on a table where guests wait for the ceremony to begin. The wedding date written in chalk on a small blackboard propped against the ceremony arch. These micro details require very little budget or technical skill but they tell guests a great deal about the couple and create the kind of emotional resonance that makes a wedding feel like a genuinely personal celebration rather than a beautiful but generic event.


DIY Mason Jar Decorations
Mason jars are, without question, one of the most versatile and consistently useful materials available to the DIY wedding couple. They serve effectively as vases, candle holders, drink vessels, favour containers, hanging light holders, and purely decorative accent pieces. Buying them in bulk online brings the cost per jar down to almost nothing, and their clean, simple shape works harmoniously in almost every wedding aesthetic from modern minimalist through to fully rustic country.

Hanging mason jars from shepherd's hooks or from a wooden beam along an outdoor aisle, each one holding a simple wildflower arrangement or a battery operated tea light, creates a pathway decoration that looks romantic and intentional at modest cost. Grouping clusters of them in varying heights on the bar or dessert table produces a styled station that reads as abundant rather than sparse. Filling them with layered sand or coloured water and a floating candle creates an inexpensive centrepiece option that works particularly beautifully for evening receptions. The mason jar's ability to serve multiple functions across a single wedding day is genuinely exceptional among DIY wedding materials.
DIY Wooden Pallet Features

Wooden pallets are remarkable DIY wedding materials because they are structurally useful, visually interesting, widely available in most regions, and frequently free or nearly free. A pallet standing vertically becomes a backdrop for the dessert table, a drinks bar with shelves across the upper section, or a seating plan display with cards clipped to the wood at different heights. Laid flat, a pair of pallets becomes a platform for a lounge seating area, a photo booth floor, or a low stage for the ceremony in an outdoor setting. Painted white and strung with fairy lights, a pallet becomes an instant and photogenic photo backdrop with enough textural character to anchor a whole corner of the reception venue. Pallets painted with chalk paint and used as table number signs create a consistent and low cost set of table markers that fit the rustic country aesthetic perfectly.
DIY Confetti and Sparkler Moments

DIY confetti made from dried flower petals is both beautiful and biodegradable, which makes it welcome at venues that restrict or prohibit synthetic confetti. Start collecting petals from your garden or from friends' gardens in the months before the wedding, choosing petals from roses, hydrangeas, peonies, or whatever blooms are available and colourful. Dry them slowly and completely in a warm room or a low oven, then store them in a cool dry place until the wedding. Package small amounts in handmade paper cones or glassine envelopes tied with ribbon and leave a basket of them at the ceremony exit for guests to collect. The result in ceremony exit photographs is genuinely spectacular, all the more so because the petals are often from flowers that have a personal connection to the couple or the setting.

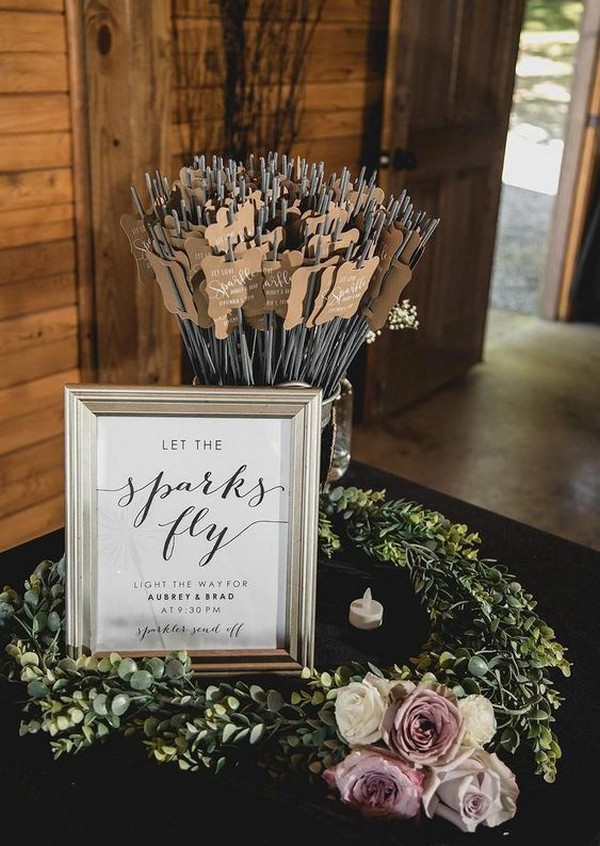
Sparklers for the evening farewell create some of the most dramatic and visually stunning photographs of the entire wedding day. Buy sparklers specifically designed and marketed for weddings rather than standard fireworks sparklers: the wedding versions are longer, thicker, and burn for enough time for the photographer to capture the moment properly without rushing. Hand them out with long fireplace matches and a note asking guests to gather close together and light them simultaneously on a count of three. The tunnel of light and sparks that results photographs like something from a film and gives the couple a genuinely joyful and celebratory way to leave their reception.
The Message in a Bottle Guest Book


A message in a bottle guest book is one of the most heartfelt and memorable alternatives to a standard signing book. Set up a small table with good quality paper cut into strips, a jar of nice pens, and a large glass apothecary jar or bottle. Ask guests to write a note, a wish, a memory, a piece of advice, or a favourite song lyric and fold it into the bottle. Seal the bottle after the wedding is over and make a commitment to open it on your first anniversary together. What you find inside is a collection of genuine, personal, and often deeply funny messages from the people who love you most, preserved in a format that is physically beautiful and emotionally significant. A standard guest book sits on a shelf largely unread after the wedding. A message in a bottle feels like a gift from your past selves every time you open it.
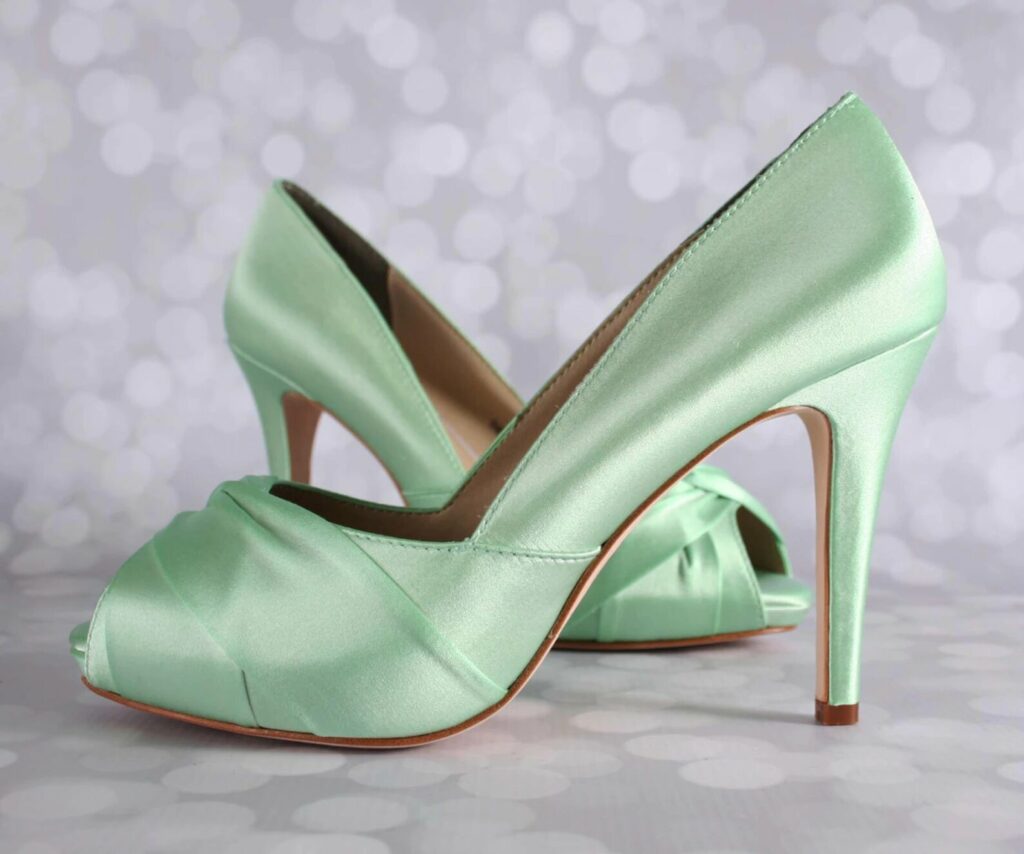
Written on Your Shoes

One of the most quietly personal DIY wedding details I have ever encountered involves writing something meaningful on the soles of the wedding shoes, visible only to the wearer throughout the day. Some couples have their vows written on the soles. Others have their wedding date, a line from a song that matters to them, the coordinates of the place they first met, or simply each other's names. It requires nothing beyond a fabric safe permanent marker and five minutes of quiet time the night before the wedding. Nobody in the room sees it. But the couple knows it is there throughout the ceremony, through the first dance, through every moment of the day where their shoes are in contact with the ground. It is a detail that belongs entirely to them, private and personal and permanent.
Making the DIY Approach Actually Work
The single most important piece of advice for a DIY wedding is to start planning and making far earlier than feels necessary. Give yourself at minimum four to six months for the larger structural projects like the ceremony arch, the centrepieces, and any painted or stained timber elements. These are the things that need time to dry, to be tested, to be revised, and to be assembled on the day without panic. Leave the smaller finishing details for the final few weeks when you have the full picture of how everything will look together and can make informed decisions about what still needs to be added and what is already complete.
Enlist help from the people in your life who actually enjoy making things. A friend who genuinely loves crafting will produce a better result with more enthusiasm than a friend who said yes out of obligation and spends the whole session wishing they were somewhere else. Ask specifically for the skills you need. Not just “can you help with the wedding” but “will you come over on Saturday and help me make forty centrepiece arrangements while we watch films and eat pizza?” That kind of specific, enjoyable ask produces better outcomes for everyone involved.
Finally, remember clearly why you chose the DIY path in the first place. It was not to produce a perfect replica of a professional wedding. It was to create something that is specifically, undeniably yours. The handmade quality, the personal choices, the creative decisions made together over months of planning: all of these things are visible to your guests even if they could not name them. They feel the difference between a wedding that was assembled from vendor catalogues and one that was built by hand with love. Trust that feeling and trust the choices you made. They are the best version of what this wedding could be.
Images Via: Deer Pearl Flowers / Modern Wedding / Country Living / Hi Miss Puff / You and Your Wedding / Popsugar / Easy Weddings


6 thoughts on “18 Budget Friendly DIY Wedding Ideas”
Comments are closed.